Can You Find the Cause of These Four Inop Loads in a Thermador Refrigerator?
Got a fun one for you today, pulled right from the annals of Appliantology. That's right -- a tech just like you encountered this whacky problem and figured it out.
Here's the weird scenario: several different loads aren't working on this Whirlpool-built Thermador refrigerator. The water and ice dispensers, the dispenser light, and the freezer light are all inop. Wow, four different loads all happened to fail at the same time! Crazy, right?
A lesser tech might have gone full PCM and started slapping in new lights and dispenser parts, but the hero of our story was no ordinary tech -- he was Master Samurai Tech trained, so he knew that when you have multiple problems at the same time, you look for a common cause.
Not only that, but he knew that the best way to begin troubleshooting was to crack out the schematic and do some load analysis. That means that you identify your Loads of Interest and figure out how they get their power source. In the case of a 120 VAC machine like this, that's going to be Line and Neutral.
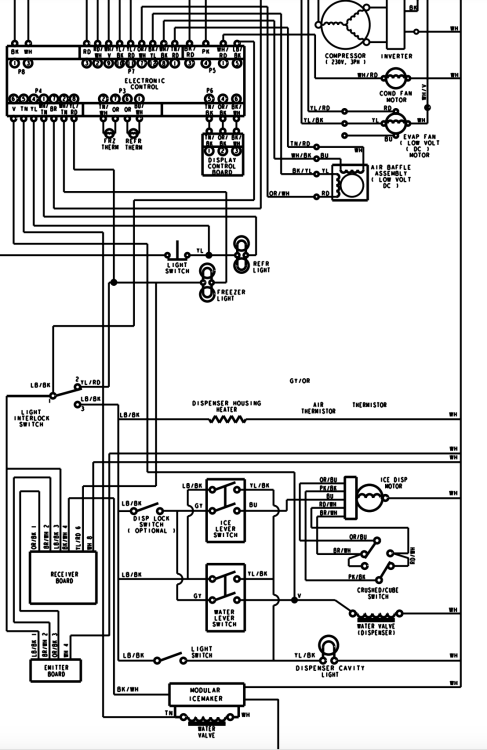
Here's the schematic in question:
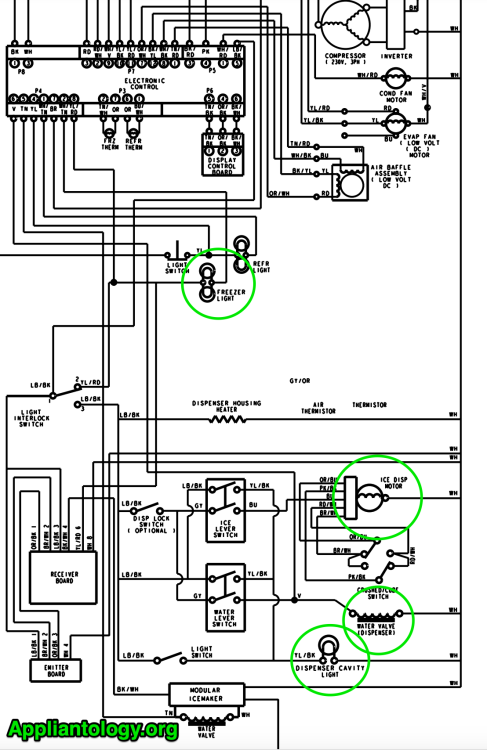
Whew, lots going on here! Here, I'll help you find our four loads:
Ice dispenser motor, water dispenser valve, dispenser light, freezer light -- all accounted for. Now's when we would start tracing out how each gets its power supply, and once we start doing that, the common element becomes clear pretty quickly. Most of them just have hard connections to Neutral, but as for Line...
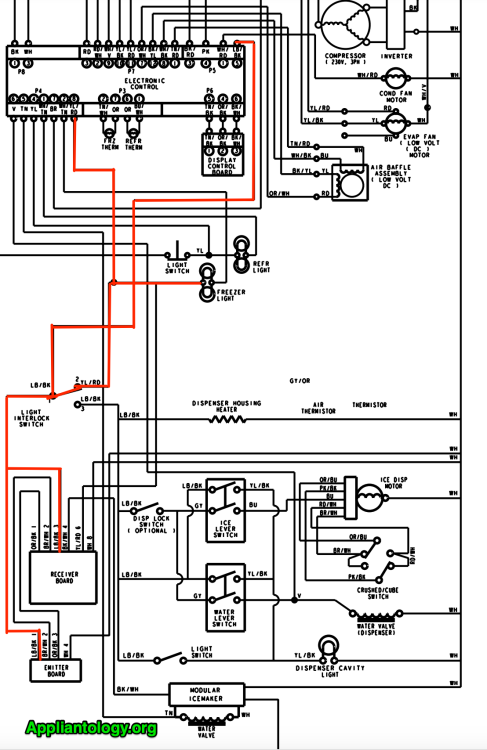
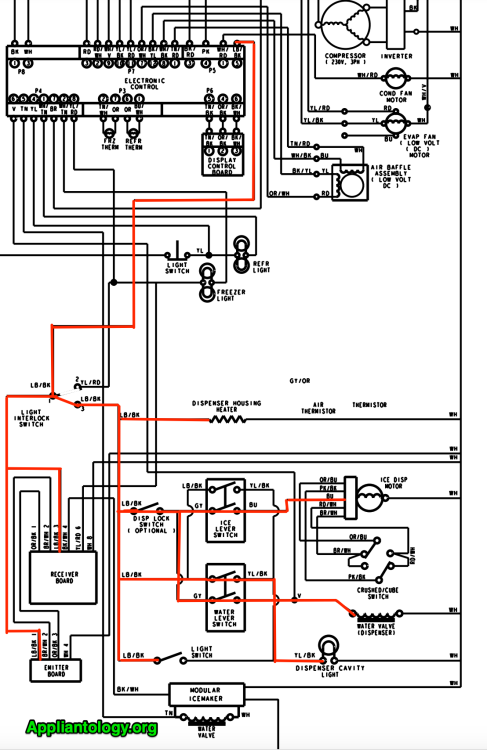
Aha! That's how the freezer light gets Line -- from P5 pin 5 on the main control board. But what about the other loads? Well, if we flip that Light Interlock Switch to its other position, here's what we get:
Now we're talking! All of our Loads of Interest get Line from P5 pin 5. Now all that remains is to check if P5-5 is providing 120 VAC -- an easy test that we can do right from the control board. If it is putting out that voltage, then we would move on to check the Light Interlock Switch.
However, as it turned out, when our fearless protagonist checked for Line at P5-5, he got nothin'. From that, he concluded that he had a bad board. And he was right! But a cruel twist of fate still awaited him...
He put in the new board, powered up the machine, and... POP! The magic smoke escaped from the brand new board. The machine was the same as before: no dispensing, no freezer light, no Line voltage at P5-5.
Our hero was undaunted. He had encountered a setback, to be sure, but his training told him that this was also another clue: a brand new board frying as soon as it's plugged in? There must be a short somewhere.
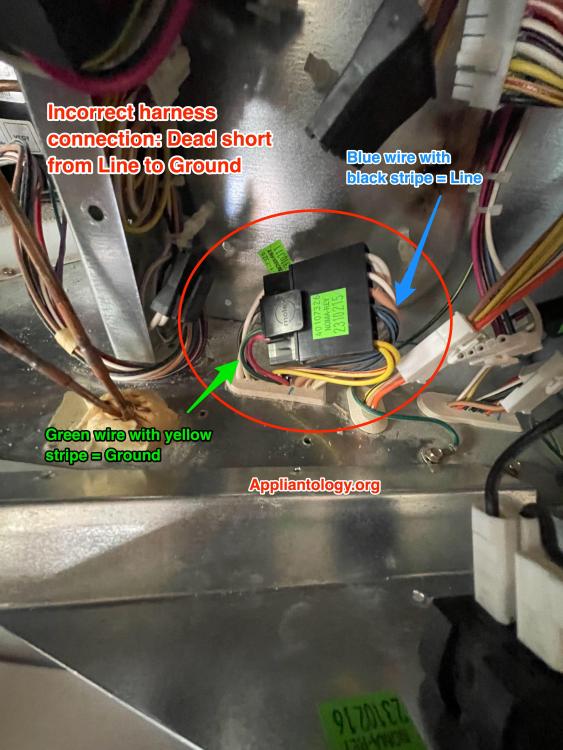
And so he descended into the belly of the beast, and there he beheld the cause of all his woes: the mangled, desecrated remnants of a PCM's handiwork -- a misconnected harness.
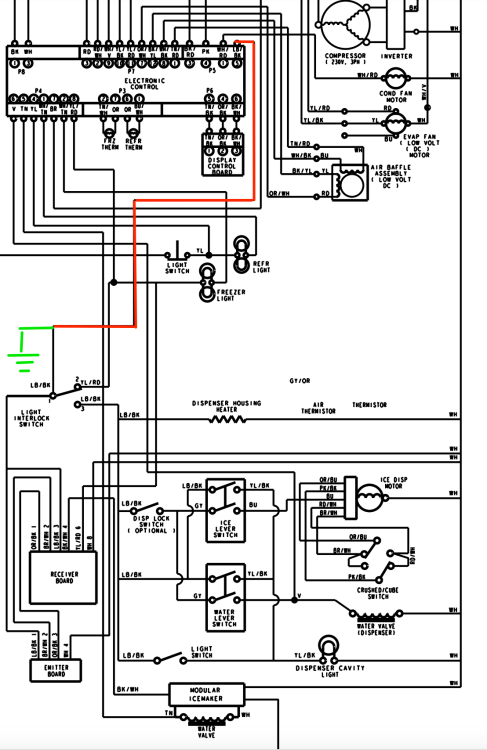
With the harnesses connected this way, you have an electrical configuration like this:
Yep, that's a direct connection from Line to Ground -- no wonder the board got fried!
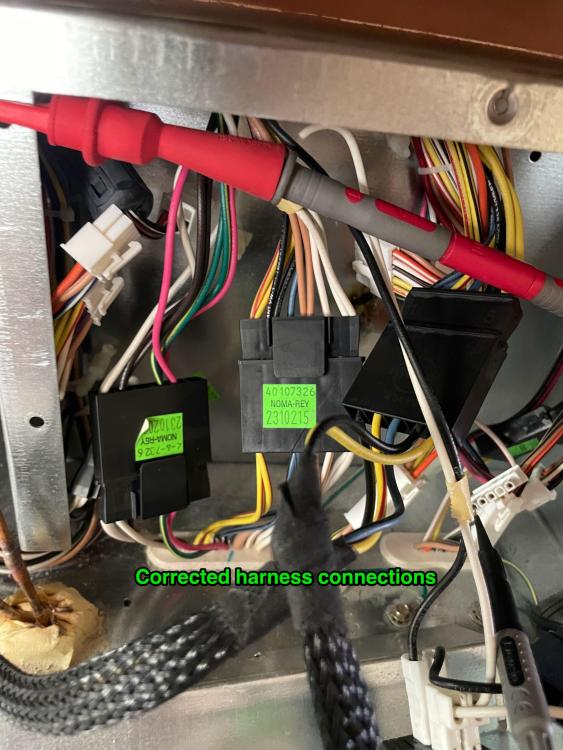
A few reconnections later, and all was right in the world.
With the corrected wiring and a new control board, our Master Samurai Tech trained hero at last laid this job to rest. Want to know how to troubleshoot even the trickiest of problems like he did? Click here to check out the Core Appliance Repair Training course over at the Master Samurai Tech Academy.
-
.png) 8
8
-
 1
1
-
 1
1


12 Comments
Recommended Comments