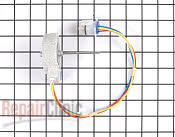
How to replace the evaporator (freezer) fan in a GE Profile bottom-freezer refrigerator
Evaporator fan part link ==> Evaporator Fan Motor
I realized that I had not uploaded any pics. In case someone else should have the same problem.
Remove all the shelves/trays/baskets, including in the icemaker.
I had to remove the freezer door (the screws that go into the door itself, 5 on each side, although we have holes for 6 on each side.).
Then the icemaker wall or separator. Just lift at the bottom to pop out the tabs and slide the bottom to the right.
Then the two white bars that the separator's tabs were in.
Then the icemaker itself. And the screw in the back holding the left side of the evap fan cover to the back wall.
Remove the other vent cover beneath the evap fan cover. It is wide. Just pull from the center and slightly downward then pull it straigth toward yourself.
The bottom is held in with 3 tabs that catch only when it is bent into place.
Then the evap fan cover has one tab by the screw and two more tabs at the right. The two at the bottom of the evap fan cover go pretty much straight in so there is no maneuvering for those.
Then the screws behind the evap fan cover that help brace the fan itself.
Then you should be able to pop the back wall out, but look around in case I forgot someting.
Just remembered you might have to extend out the drawer rails on the right side of the freezer. They got in the way for me.
You'll see two white plastic screws coming out of and pointing up from the two vents BELOW the evap fan cover, one each vent. Don't touch those, they just help hold stuff (insulation) to the other side.
Once you remove the back wall, you can remove two more screws for the fan that hold it in and remove the plastic tie that holds several wires including the fan wires, in place (in the left upper corner)
The tie has a whole in it for screwing into the back wall and had no idea where to get another like it. So, I just used a small screwdriver to slide it out from itself and then reused it.
OK. Now replace your fan and do everything in reverse! (Oh! Joy!)
Part link ==> Evaporator Fan Motor
Source: GE Profile Refrigerator -- Model: PFSS5NJWASS - Part 2


0 Comments
Recommended Comments
There are no comments to display.