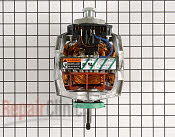
How to replace the motor in a Huebsch stackable coin op dryer
Dryer seems to be made by Maytag / Amana
similar to ALE866SCW and others
click on picture
from the
Home Laundry Dryers Service Manual for Amana
for other service manuals and other perks, become an Apprentice
Disassembly Procedures
Front Panel
NOTE: Service access panel must be removed first to remove front panel.
NOTE: Top edge of front panel is held in place by two spring clips and panel locator(s) located on top flange of the front panel.
1. Disconnect power supply to unit.
2. Remove screws securing bottom of front panel.
3. Lift the bottom of front panel outward to release the spring clips and panel locator(s)
.Front Bulkhead
1. Disconnect power supply to unit.
2. Remove front panel, see “Front Panel” procedure.
3. Remove belt from motor and idler pulleys.
4. Remove screws securing bulkhead to front side panels.
5. Lift bulkhead assembly out of slots located in side panels and remove.
6. Remove cylinder glides from each glide bracket.
• Unsnap glide from each glide bracket.
7. Reverse procedure to reassemble.
NOTE: Verify felt seal on exhaust fan cover is airtight on flange of duct.
If seal is installed improperly air flow will be restricted which can cause poor dryer performance.
When installing the cylinder seal it is important that the stitching on the seal face towards the dryer center.
The short flap must be glued to the bulkhead and the long flap left loose.
NOTE: Adhere sealant (No. 22506P) to bulkhead using a continuious bead completely around the entire flange
where the felt seal contacts the bulkhead.
Motor and Exhaust Assembly
1. Disconnect power supply and shut-off gas supply to unit (if so equipped).
2. Remove front panel, see “Front Panel” procedure steps 1 – 3.
3. Remove screws securing cabinet top to side panels.
4. Raise cabinet top to a vertical position.
5. Disengage belt from motor and idler pulleys.
6. Remove front bulkhead, see “Front Bulkhead” procedure.
7. Carefully remove cylinder out through front of dryer.
8. Disconnect wires from thermostat/thermistor and heater.
NOTE: Refer to appropriate wiring diagram when rewiring thermostat and heater.
9. Disengage motor wire harness terminal block from motor switch by pressing in on the movable locking tabs
(located on each end of the terminal block) and pulling away from motor.
10.Remove screws securing motor mounting bracket to dryer base.
NOTE: When reassembling, be sure seal on exhaust fan cover makes airtight seal on flange of duct.
If the seal is installed improperly, the airflow through the exhaust system will be restricted which can adversely affect dryer performance.
NOTE: When reinstalling motor and exhaust assembly, be sure wire harness on right side is clipped to motor mounting bracket
and is routed along dryer base (between motor mounting bracket and right side of cabinet).
Tab on rear of motor mounting bracket must be inserted into slot in dryer base.
Be sure the belt has been installed on the correct side of the idler lever.
Source: Huebsch Stackable coin op dryer Model HSG119WF serial 0203014719


0 Comments
Recommended Comments
There are no comments to display.