Removing the blower wheel from the motor in a Whirlpool dryer
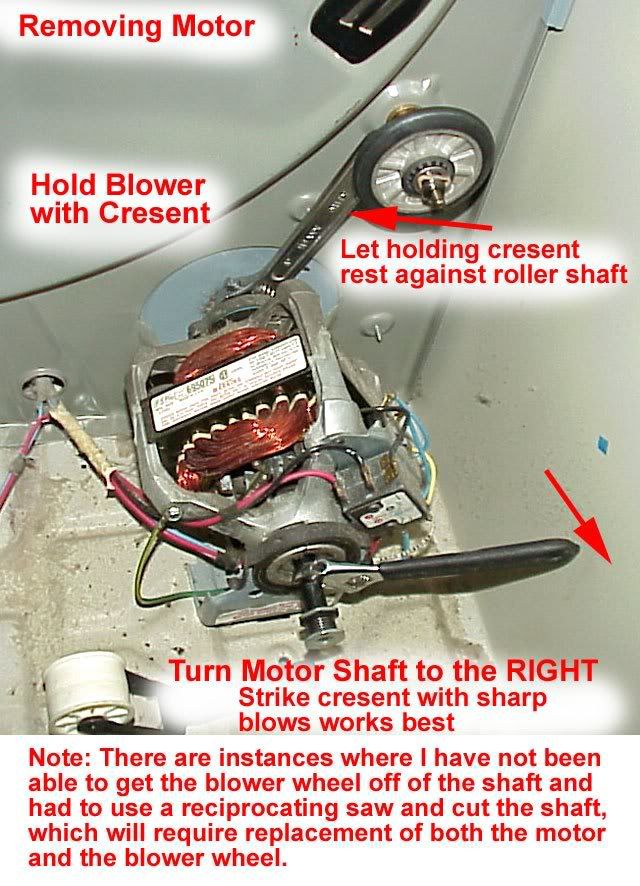
Some tricks, tips, and techniques for removing the blower wheel from the motor in the Whirlpool-built dryer with the lint filter in the top panel.
This is how I'm doing it. TO THE T!
no wonder, you'll never get it apart that way.
Leave the front clip on
use the biggest cresent wrench you can on the blower wheel.make it as tight on the plastic as you can.
rotate the cresent wrench to the right so it's up tight against the cabinet or drum roller shaft
then take a big pair of vise grips and lock it on the belt pulley, lock it in the 12:00 position as tight as possible.
then wrap some electrical tape around the vise grip to keep it from unlocking.
now take something solid an hit the vise grips to drive them clockwise.hit it hard
this works 90% of the time or more.
Lock the belt pulley end shaft in a vise.
Use a pipe wrench to remove the nut on the blower end.
If that fails use a Dremel type cutting wheel to remove the nut.
Buy Whirlpool dryer parts with a 365-day return policy here ==> http://www.repairclinic.com/Whirlpool-Dryer-Parts?RCAID=24038
Source ==>


0 Comments
Recommended Comments
There are no comments to display.